Dance Hair and Makeup Tutorial

Dance Hair and Makeup Tutorial
It's showtime!
It’s showtime!

Forgive the lack of postings lately, my mind and energy has been taken up with stage mom duties this week. My organizational talents have been pulled to the feminine art of beauty. We have been practicing dance routines and pulling together costumes, hair and makeup. Dress rehearsal was the first chance to test all of this out.

Since I know at least one of my readers is interested in styling children for an upcoming wedding, I thought I would share what I have learned.

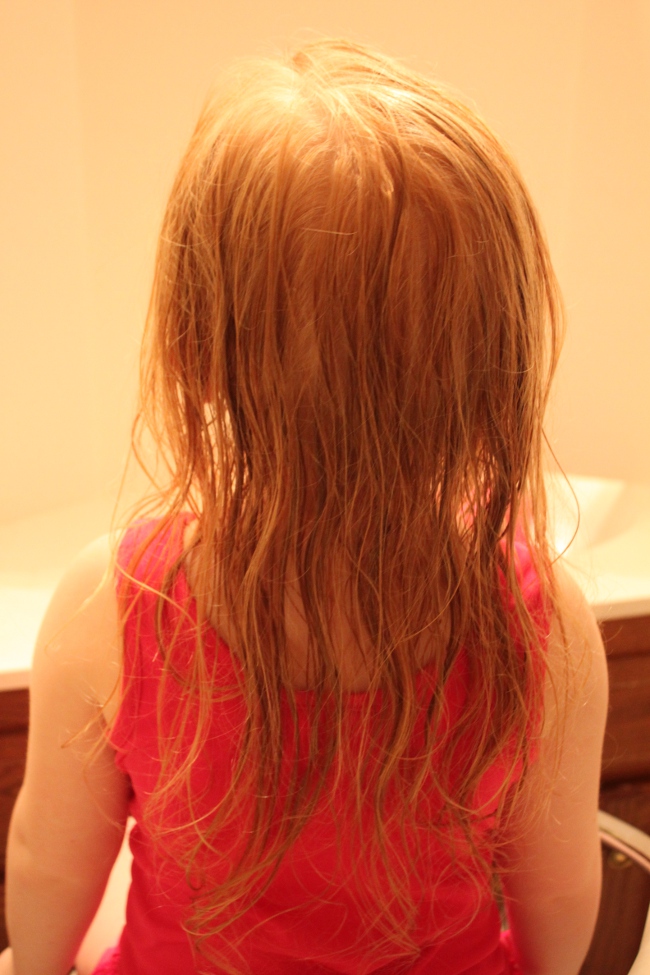
At first, the hair style needed for our production was a bun. I was happy because a bun is a very easy hairstyle for me to do on my children and one that we wear to ballet practice each week. But then, because my children are wearing hats for their costume, it was decided that buns would not work under the hats and long, curly hair was needed instead. Long, curly hair is gorgeous but also the most labor intensive style for us as we are starting with long, straight hair. Here is how we pulled it off.

Start with damp, freshly-washed hair.
Add a generous squeeze of hair gel.  (I actually squeezed it into my hand, rubbed it into my hands and then put it into my daughter's hair.)
Add a generous squeeze of hair gel. (I actually squeezed it into my hand, rubbed it into my hands and then put it into my daughter’s hair.)
Comb the gel evenly through the hair.
We tried two different types of curls.  For the first set, we sectioned the hair into small sections, sprayed each section with a strong hold hairspray and then rolled them into sponge curlers.
We tried two different types of curls. For the first set, on my daughter with fine, easy-to-curl hair, we sectioned the hair into small sections, sprayed each section with a strong hold hairspray and then rolled them into sponge curlers.
The finished sponge curler set.
For the second set of curls, on my daughter with hard-to-curl long, thick hair, I ran out of curlers!  I ended up cutting up an old undershirt from my husband into small strips and doing rag curls.  I found it worked best to put the rag curl right next to the head and wind from the scalp to the root in a spiral style.
For the second set of curls, on my daughter with hard-to-curl long, thick hair, I ran out of curlers! I ended up cutting up an old undershirt from my husband into small strips and doing rag curls. I found it worked best to put the rag curl right next to the head and wind from the scalp to the root in a spiral style.
When I finished with each section of hair, I just tied the ends of the rag together (like the first step in tying a shoe).  Amazingly, the ends of the hair did not come undone and the curl held tightly with no other fastening needed.
When I finished with each section of hair, I just tied the ends of the rag together (like the first step in tying a shoe). Amazingly, the ends of the hair did not come undone and the curl held tightly with no other fastening needed.
The finished rag curl set.  I needed a lot of curlers.  A bonus of this method is that the rag curlers were comfortable for sleeping.
The finished rag curl set. I needed a lot of curlers. A bonus of this method is that the rag curlers were comfortable for sleeping.
The next day.  The rag curls before separating and styling them.  They worked great!
The next day. The rag curls before separating and styling them. They worked great!
The sponge curler curls after styling and separating.  They also came out great but the sponge curlers did not hold as tight as the rag curlers and tended to fall out and loosen.
The sponge curler curls after styling and separating. They also came out great but the sponge curlers did not hold as tight as the rag curlers and tended to fall out and loosen.

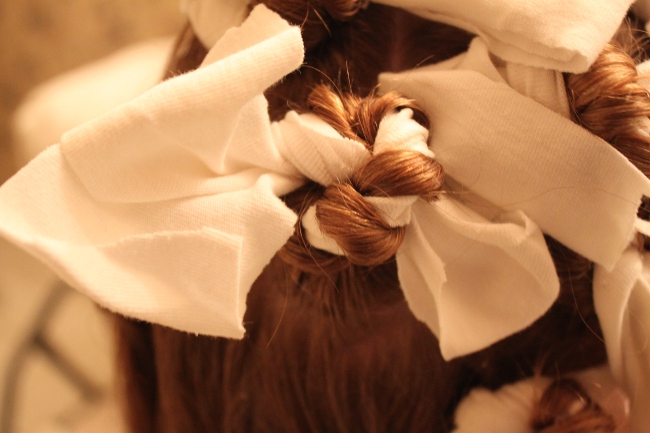
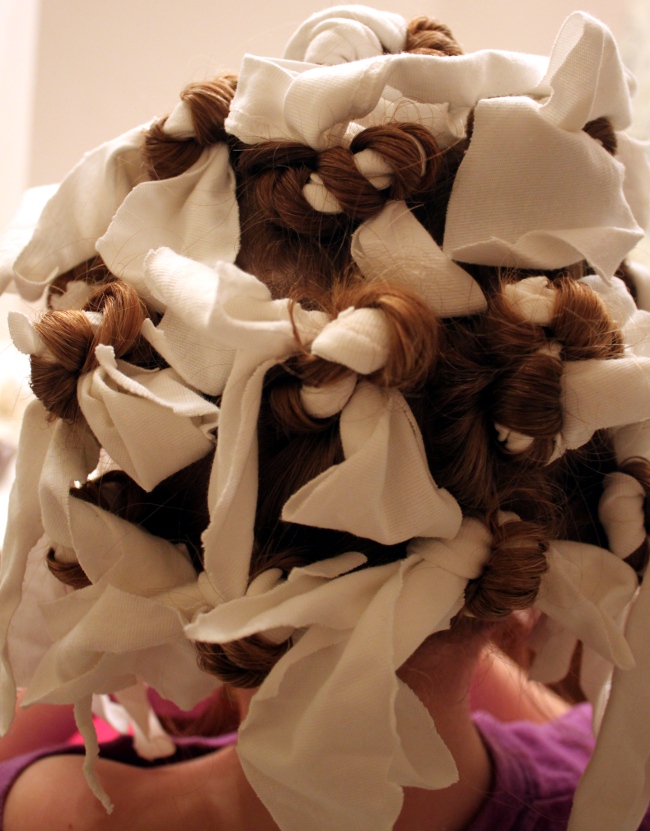
For the performance, I am going to put rag curlers on both girls. The rag curlers are also great because you can wash them in the washing machine after each use.

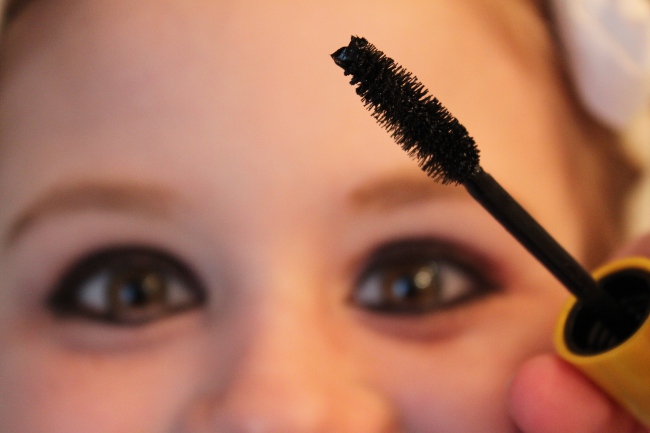
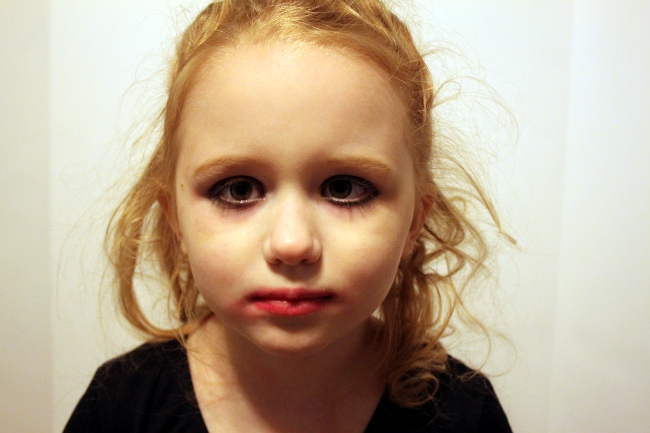
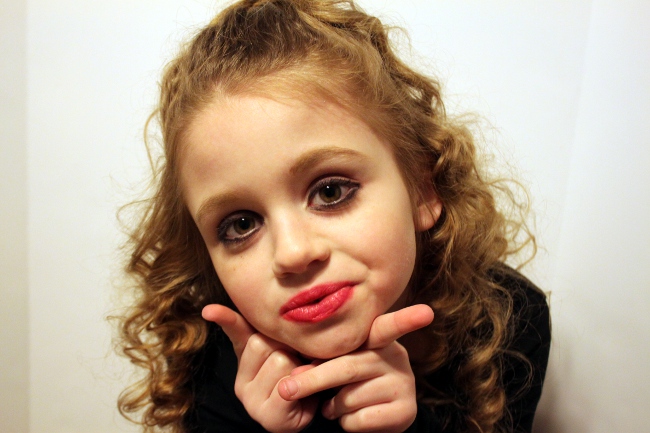
The last time I posted about stage makeup was for a ballet production. This time it was for tap dancing. We were given a makeup sheet that showed a beautiful picture of Rihanna with smoky eyes and bright red lips and told to copy the picture as closely as possible. It is beautiful makeup but I had never done makeup like that before.

I sent emails off to two of the major drugstore-brand cosmetics companies asking for help in figuring out which of their long-wearing products to choose for this look. The first reply came back that their makeup products were not tested for use on children and therefore the company would make no recommendations for me. I thought this was an odd response from a PR perspective as if the products might not be safe for use on children why would I be confident that they are safe for adult use? The response from the second company gave an off-topic response about how to match foundation to your skin tone. So, essentially, the makeup companies were no help at all.

It was YouTube to the rescue. The ladies with makeup channels on YouTube were full of suggestions about the best products to use and they showed exactly how to create a given look. I browsed a couple of videos about how to do a smoky eye look on fair skin. This video from Chloe Morello was particularly helpful about how to do a glossy red lip.

Makeup technology is constantly changing and even since I last was doing stage makeup two years ago, there are many new products on the market. I learned from the YouTube videos about eye shadow primer, eye lacquers for eye lining and lip stains instead of lipstick. After about $40 at our local pharmacy and grocery store makeup counters, I had the supplies I needed.

The makeup arsenal we needed to achieve the stage look.
Step One: Foundation.  I am working with extremely fair-skinned children.  You can see that even the lightest shade of foundation is still a bit orange on their skin.
Step One: Foundation. I am working with extremely fair-skinned children. You can see that even the lightest shade of foundation is still a bit orange on their skin.
Applying the eye primer below and on the eyelids.
I started off applying the highlight shade all over the eyelid.  On my skin, this creates a glowing undertone and a white cast.  On their fair skin, this shade completely disappeared and did not show up at all.  It was the same for any very light tone.  I came to realize that makeup on fair skin is all about careful application of darker tones.  The highlight tones are the skin itself.  This is quite different from makeup on my own skin where I apply both highlight tones and darker tones.
I started off applying the highlight shade all over the eyelid. On my skin, this creates a glowing undertone and a white cast. On their fair skin, this shade completely disappeared and did not show up at all. It was the same for any very light tone. I came to realize that makeup on fair skin is all about careful application of darker tones. The highlight tones are the skin itself. This is quite different from makeup on my own skin where I apply both highlight tones and darker tones.
Applying the darker tones.  The picture we were supposed to copy had a purplish eyeshadow tone.  We found that purple tones show up best when mixed with a little brown.
Applying the darker tones. The picture we were supposed to copy had a purplish eyeshadow tone. We found that purple tones show up best when mixed with a little brown.
Coloring in the eyebrows with a light brown pencil.  For fair skin, making sure not to go too dark with the eyebrow pencil is a must to avoid a clown eyebrow look.
Coloring in the eyebrows with a light brown pencil. For fair skin, making sure not to go too dark with the eyebrow pencil is a must to avoid a clown eyebrow look.
Eye lacquer, where have you been all my life?!?  This is really a wonderful product.  It is dark like liquid eyeliner but the consistency is more like a cross between a powder and a pencil.  It is so easy to apply too!
Eye lacquer, where have you been all my life?!? This is really a wonderful product. It is dark like liquid eyeliner but the consistency is more like a cross between a powder and a pencil. It is so easy to apply too!
One of the hardest makeup tasks is applying black eyeliner to wiggly children.  They always blink at the wrong time.
One of the hardest makeup tasks is applying black eyeliner to wiggly children. They always blink at the wrong time.
Next, mascara!  Also very hard to apply on small children.
Next, mascara! Also very hard to apply on small children.
What a difference mascara makes!  Right eye with mascara.  Left eye without.
What a difference mascara makes! Right eye with mascara. Left eye without.
Bronzing blush.  We were told to use a taupe colored blush, which adds a beautiful highlight to medium to darker toned skin.  This tone didn't show up on my children at all.  I may have to add in a browner shade for the performance.
Bronzing blush. We were told to use a taupe colored blush, which adds a beautiful highlight to medium to darker toned skin. This tone didn’t show up on my children at all. I may have to add in a browner shade for the performance.
Adding in the bright red lip stain/lacquer and completing the finished look.
The finished look on my redhead.

When I finished with all the hair and makeup I was a bit surprised to see my daughters looking like teenagers. They loved it, of course!

Mom, do I look famous?

While the makeup looks a bit crazy close-up, here is how it showed up under the stage lights.
Another view of the makeup in stage lighting.

When it comes to stage makeup for children, however, the key factor is wearability. I was interested to use the eye primer this time because it it supposed to help keep the eyeshadow on and it did. The eye lacquer liner also held up beautifully. It did not run at all, even after a few tears. The red lipstick, however, was no match for my 5-year old. The brand we used smudged very easily. I was constantly having to fix her lipstick smears. (Diaper wipes are great for this.) By the end of rehearsal, the lipstick was completely gone from my 5-year-old but it did hold up on my 8-year old.

After several hours of rehearsal, here is how the hair and makeup ended up.  The eye makup stayed, the curler curls fell out and the lipstick is gone.
After several hours of rehearsal, here is how the hair and makeup ended up. The eye makup stayed, the curler curls fell out and the lipstick is gone.
On my older daughter, the rag curls had better staying power and her makeup was mostly intact after rehearsal.

As for removing the makeup, we used eye makeup remover pads and it all came off relatively easily. The waterproof mascara and eye lacquer however did require multiple applications of the remover. Baby oil or mineral oil would probably work too.