Black History Month Cookie Display

Black History Month Cookie Display
A cookie to celebrate black history month.

Our dance performance tonight is part of a black history month celebration. My volunteer assignment was to bring cookies for the performers. To celebrate all the hard work that has been put into this performance, I wanted to try to make my cookies a little special but without putting in too much work.

My first idea was to make chocolate cut-out cookies in the shape of dancers. There is a surprising lack of dancer cookie cutters out there. There are many wonderful dancer silhouette shapes, however. I printed out several and cut them out. I used this recipe and read some tips online about freezing the dough before cutting out the shapes as well as just before baking to keep the crispness of the shapes.

Cutting out the dancer silhouettes.
Freezing the cutouts before baking.
Dancer cookies before baking.
Dancer cookies after baking.  They held their shape!  The heartbreaking part after this, however, was that most of them broke when I took them off the baking sheet!  next time, I would bake them on parchment paper.
Dancer cookies after baking. They held their shape! The heartbreaking part after this, however, was that most of them broke when I took them off the baking sheet! next time, I would bake them on parchment paper.

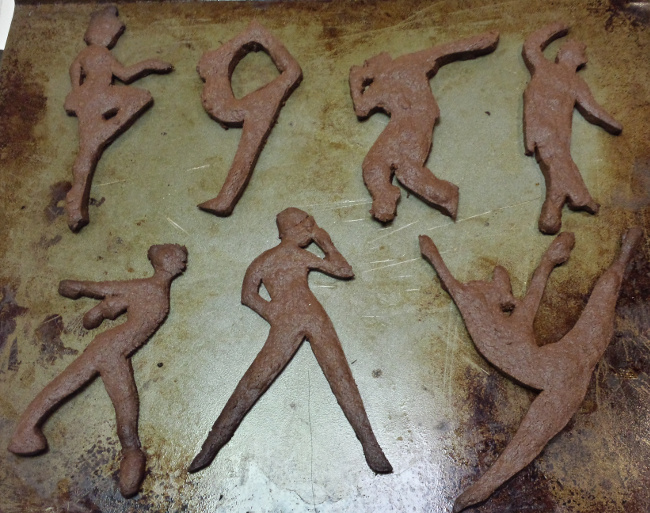
This idea was working but was going to take way too much time for all the cookies. So, I decided at this point to just use a few of the dancer cookies for the display and using one of my no-fail drop cookie recipes for the rest.

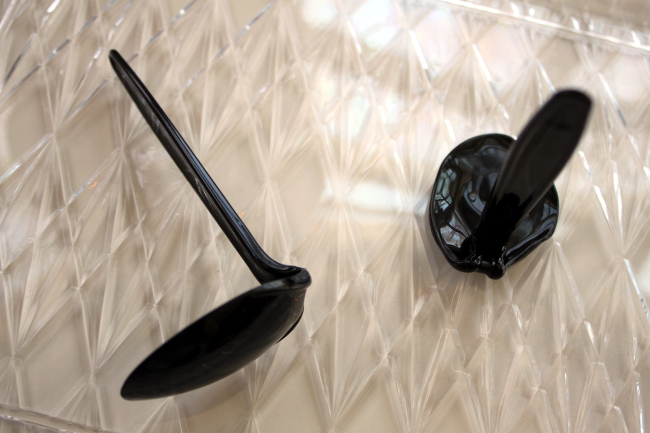
With all the other things we had to keep track of during the performance, I didn’t want to have to remember to take home my cookie display. So, I had my husband pick up a tray from the dollar store on his way home from work. I knew I needed the cutout cookies to be able to stand up on this tray. After some thought, here is the method I came up with.

The display supplies needed: plastic tray from the dollar store, candle and matches, plastic spoons.
I carefully held each spoon over the flame until the plastic began to soften.  I then bent the spoon handle to a 90 degree angle and then melted the base of the spoon just enough so that it would adhere to the plastic tray. Be careful handling the hot spoons!
I carefully held each spoon over the flame until the plastic began to soften. I then bent the spoon handle to a 90 degree angle and then melted the base of the spoon just enough so that it would adhere to the plastic tray. Be careful handling the hot spoons!
Shaping the melted spoons.
The finished tray with built-in cookie stands.
Decorating the cookies with melted chocolate and sprinkles.
After decorating the cookies, I painted each spoon stand with melted chocolate and attached the cookies to them.
The last step was to layer on the cookies!  Yum!
The last step was to layer on the cookies! Yum!

You could obviously adapt this display technique for a number of different occasions. The next time I am at the dollar store, I will stock up on a few of these disposable trays to have on hand for potlucks, summer cookouts or future cookie-making assignments!