Countertop Clearing Updates

I have been working on clearing off my countertops per my previous post. This has been an interesting and somewhat complex challenge because it forces me to address unresolved storage and organization problems. The countertop is the first place things go when they don’t have an assigned storage area.
Clearing the countertop in my kitchen also required some minor home improvements. I don’t know how to use power tools but I am great at coming up with projects where they are needed! My wonderful husband generously agreed to come to my rescue here. (It also gave him an excuse to buy a few new tools.)
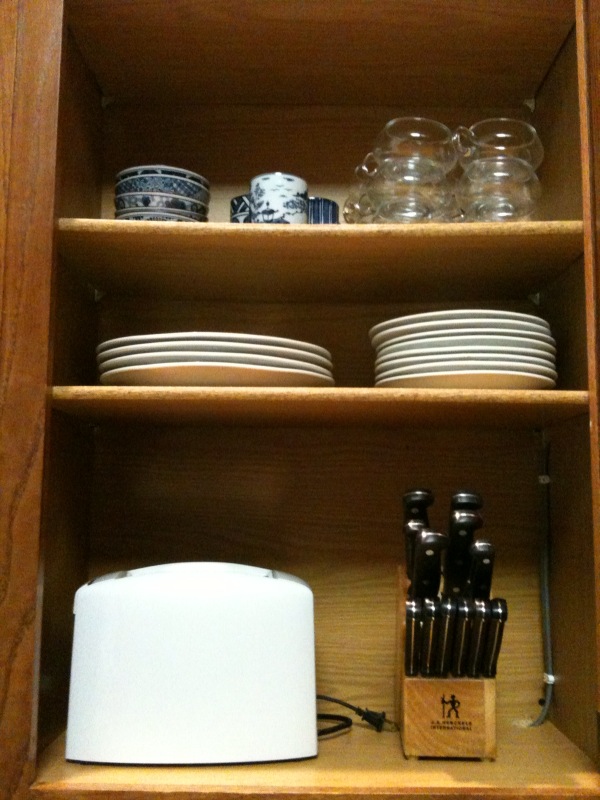
The first area of the countertop clearing that was bothering me was the grouping of the knife block, toaster and microwave. Although these were pushed to one of the far corners of the kitchen counter, they took up almost 3 feet of counterspace and made the countertop hard to clean. After a little thought, I decided to reorganize the cabinets above the countertop and make an “appliance garage” on the first shelf of the cabinet. The knife block and toaster now live there. We don’t use the toaster as often as I remembered so it has not been a problem to take it out and plug it in as we need it. The rest of the time we get to enjoy all the extra space!

Making the knife block fit on the shelf required that I readjust the shelf heights. Fortunately all of our cabinet shelves are adjustable so I moved the pegs as needed. There wasn’t a peg hole for the height I needed for the knife block, though, and my husband drilled some new ones.
Moving around the shelves gave me the opportunity to dust off the shelves and get rid of things that we weren’t using. I got rid of 3 boxes(!) of dishes, including one of the world’s largest collections of stainless steel company branded coffee mugs (crazy for two people who don’t drink coffee!) and insulated lunch sacks.
Getting the microwave off the countertop required a little creativity and more carpentry work. I made another “appliance garage” for the microwave in a little-used cabinet above our oven. First, I checked the owners manual for the microwave to make sure I wasn’t going to create a fire hazard. The owners manual said the microwave had to be placed at least 36 inches off the ground (anyone know why?) and that there be at least 3 inches clear on either side of the microwave. While the new cabinet space appeared at first to be more confining, it actually was safer than the previous countertop setup where there was no clearance on either side. I measured the cabinet I wanted to use and the dimensions were just right.

In order to get power to the microwave, we had to purchase a 6 foot extension cord made for appliances and create holes for the cord to pass through the cabinetry to the outlet plug. My husband purchased a corded drill (the cordless drill we have did not have enough power to cut holes in the dense hardwood the cabinets are made of), and drilled some small holes for the cord. He then tacked the cord beneath the cabinet and attached velcro tape to the back of the plug so it hides out of sight when not in use.
Since the new microwave cabinet was especially tall, I wanted to add in another shelf above the microwave to store serving trays and other items. I measured the space and took my dimensions to our local Home Depot. I found a piece of 1/2” MDF and the nice guy in the hardware department cut it to fit. Back home, husband had to drill more small holes to fit in shelf pegs and the new shelf dropped right in. Voila! More counterspace AND more storage space! Fantastic!
|
|
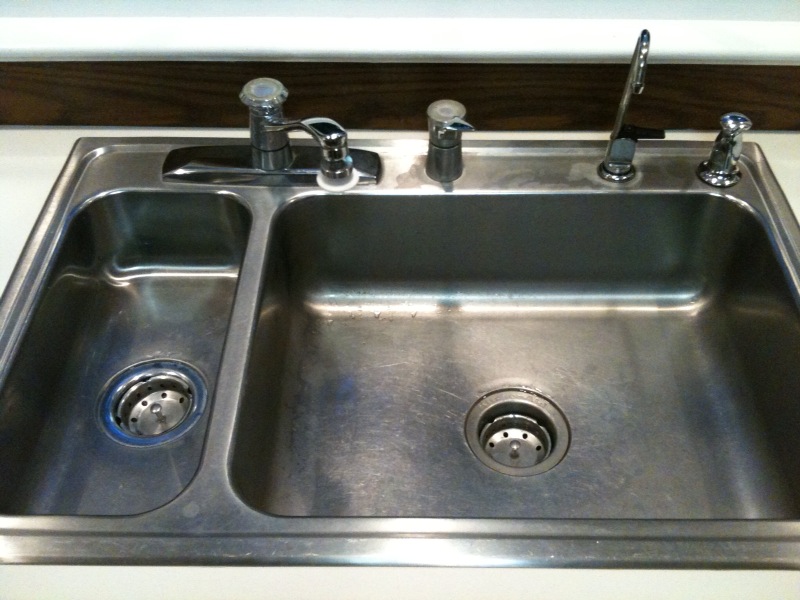
Next, I noticed that our sink had an unused hole in it. I thought this could be used for a soap dispenser so that we could get rid of the ugly dishwashing detergent bottle. When I unscrewed the cover plate for the hole, however, I found that the existing hole was too small for a soap pump and was only about 1/2” wide! I consulted my handyman husband:
“Can you make that hole bigger?”
“I don’t know. Drilling through metal is a lot different than drilling through wood.”
(Disappointed) “Really? It is?”
Sure enough, it is. It can be done but it is tough to do it right. I thought we would have to abandon this project when I came across this video from Tim Carter of askthebuilder.com:
I consulted my expert:
“Yeah, that could work.”
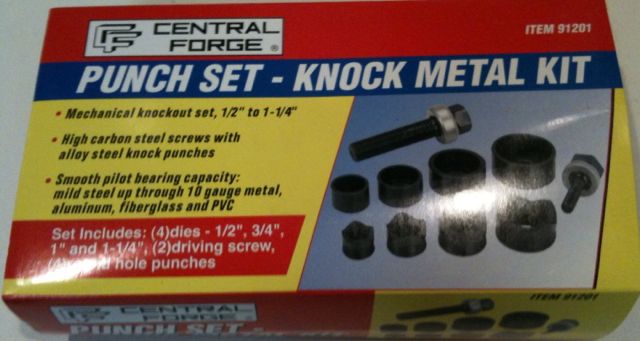
The next problem was finding the wonderfully named “knockout punch.” At the first hardware store I checked, they didn’t have any but the nice older gentleman in the hardware department gave me his home telephone number and told me that if we couldn’t find one my husband could just come over and borrow one of his if he promised to bring it back. (There are still some wonderful small-town aspects to life here in Fredericksburg.) At the next hardware store I checked, the young male assistant was intrigued by my description of the tool but didn’t know if his store carried it. “Let me Google that,” he said. A few minutes later he called me over to a computer screen where he had roped in another assistant to help, “Is this what you are looking for?” “Yes, that’s it!” I said. “No, we don’t carry those.” But then they pointed out that in the comments on the website, it said that Harbor Freight Tools had a great kit for about $20. Off to Harbor Freight, where I found the kit in less than 5 minutes. “Wow! This is a really great store!” I commented to a fellow shopper. “Yes! But don’t let dad loose in here!” the shopper cautioned.
|
|
With my knock-out punch set in hand, my handyman had no excuses not to finish the job. It was actually pretty easy (at least from the observing perspective). A few twists of the wrench and out pops a disc of metal. He had to do it twice to gradually size up the hole to the 3/4” size we needed. It was a quick 10-minute project and the soap pump works great. Once we run out of the regular dishwashing soap, I plan to get a dishwashing soap that will also double as a hand soap so I don’t need a separate handwashing soap pump too.
|
|
|
|
Another countertop clearing task was to swap the countertop plant for a hanging plant. That required a ceiling hook. It took another visit to Harbor Freight to find one. They were sold in a boxed kit with several types of hooks, wall anchors and screws. When my husband drilled into the ceiling however, we found that our setup was two layers of drywall followed by a stud so the wall anchor wasn’t going to work and the screws weren’t long enough. Ugh! Back to yet another hardware store (Harbor Freight does not carry loose screws) where a nice assistant helped me find the “10-24 x 2 zinc hanger bolt” I needed.

So, as you can see, it has taken a bit of effort to get to a “countertop zero” status and I still have more counterspace to clear. It is not just about cleaning but about designing the space so that things can be put away properly and easily and resolving unresolved storage problems. My kitchen has never really felt “right” to me and it is finally starting to get to the state where I want it. The home improvement projects have made a big difference but another simple thing that had a big impact was just getting rid of all those unused dishes!
My goal for my kitchen is to get it to a stark, vacant, minimalist state with just countertops and appliances. This is not typically my style so this will be the one spot in the house where we adopt this approach. The areas we have cleared are already helping. When we bring in groceries, it is a snap to set them on the counter while we put them away. Visually, it is also easy to know that if there is ANYTHING on the counter that we need to clean up. When there is other stuff that permanently resides on the counter, it takes a little more mental work to figure out what belongs there and what doesn’t.
|
|
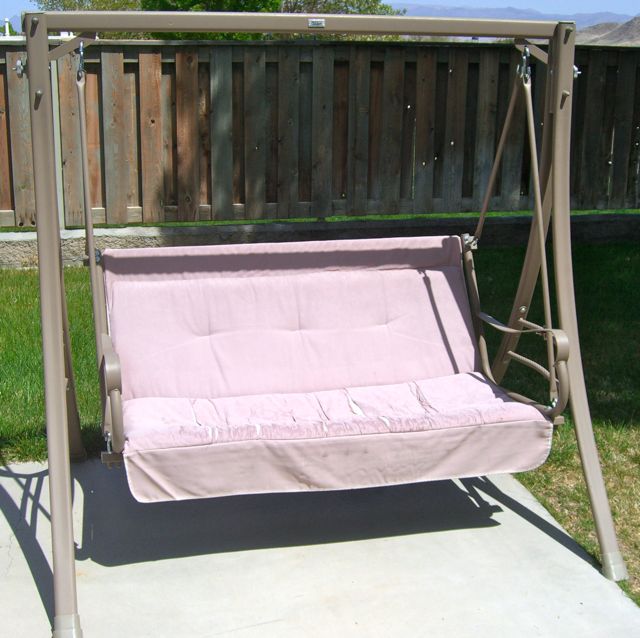
One other transformation success story for you comes from Ruly Ruth. After reading my patio furniture transformation post, she did a transformation of her own on a glider swing she was given by a neighbor. She used the Wal-Mart foam mattress pad trick to pad the seat, sewed it in place and then used an outdoor cotton rug as her cushion material and sewed that in place as well. Great work, Ruth!
|
|
I hope your home projects are bringing you joy as well. Please feel free to share your progress and success stories in the comments.
P.S. to my husband . . . Thank you for all your help with this project and for being supportive even when I suggested we drill holes in our cabinetry! You are amazing!
P.P.S. Many thanks to Abel Braaksma whose blog post on WordPress blank pages for long posts made this post possible.


